Overview
Because Windows 11 has some unique boot requirements, in this post I will describe how to setup a Windows 11 Pro virtual machine within Proxmox.
What is Proxmox
According to their website, Proxmox (technically Proxmox Virtual Environment, or Proxmox VE):
Proxmox Virtual Environment is a complete, open-source server management platform for enterprise virtualization. It tightly integrates the KVM hypervisor and Linux Containers (LXC), software-defined storage and networking functionality, on a single platform.
…
The enterprise-class features and a 100% software-based focus make Proxmox VE the perfect choice to virtualize your IT infrastructure, optimize existing resources, and increase efficiencies with minimal expense. You can easily virtualize even the most demanding of Linux and Windows application workloads, and dynamically scale computing and storage as your needs grow
In other words, Proxmox VE is an enterprise-grade open source bare-metal hypervisor. Proxmox is “free” to use and is licensed under GNU Affero General Public License, v3 (GNU AGPLv3).
Creating a Windows 11 Pro VM
First we need to gather ISO images we will need for later.
- Windows 11 Pro ISO (download here)
- Windows VirtIO Drivers (select the ISO option) (download here)
Step 1
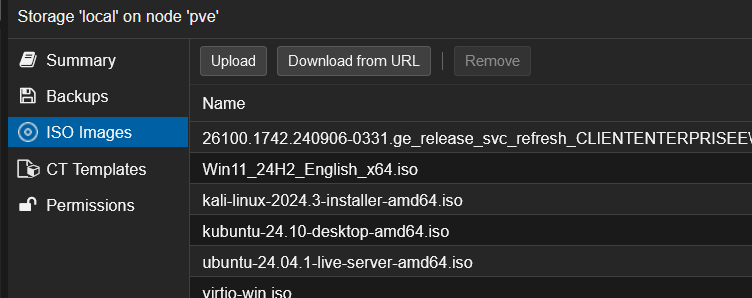
- Login to Proxmox
- Add the Windows 11 Pro and VirtIO Drivers ISO to Proxmox
- By default:
- Select local storage pve
- ISO Images
- Upload
- By default:
Step 2
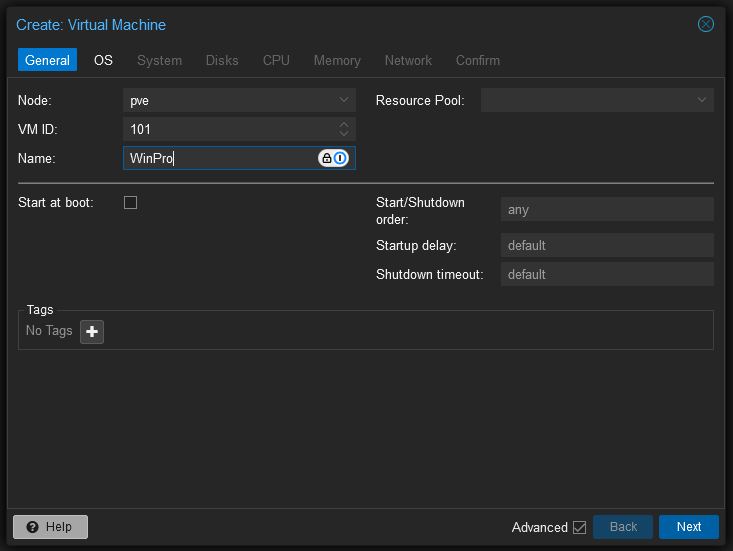
- I am going to assume you already have storage configured.
- By default click “Create VM” in the upper right corner
- Choose the node you want the VM to belong to (default is pve)
- Select the VM ID (this should be populated by default)
- Create a name for the VM (I am using “WinPro”)
Step 3
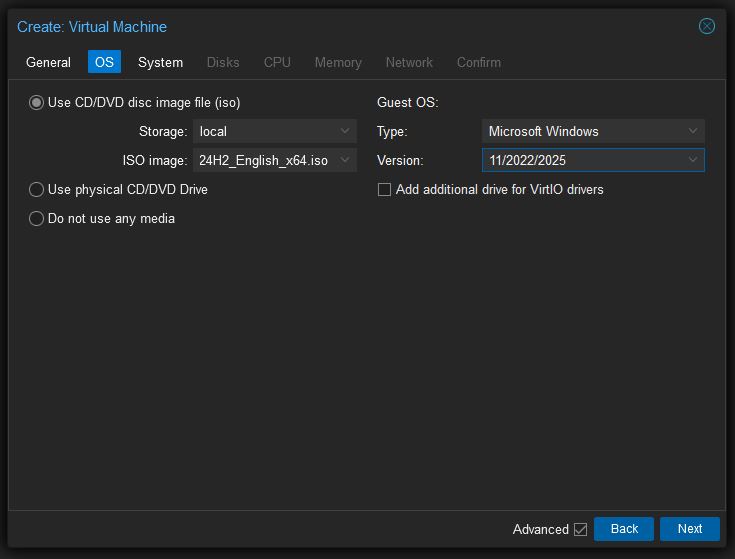
- Under “ISO image,” find the Windows 11 Pro ISO image
- Under “Guest OS” choose “Microsoft Windows” as the type
Step 4
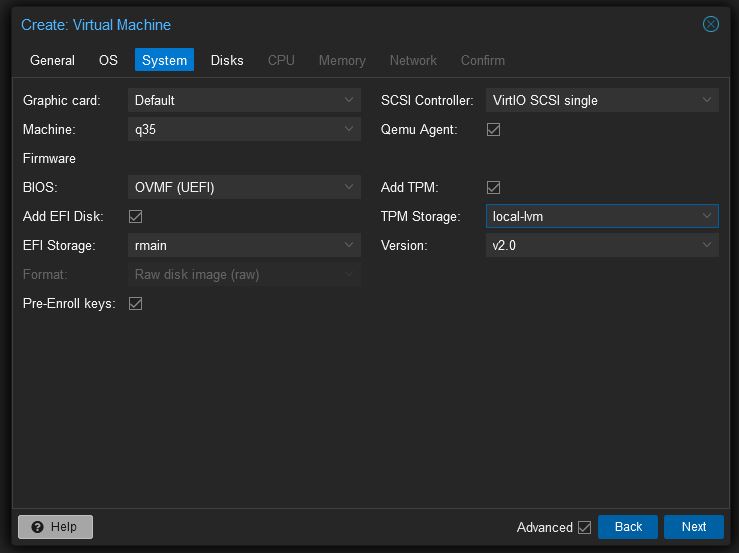
- The main things to focus on under the System tab are:
- Machine: q35
- BIOS: OVMF (UEFI)
- Add EFI Disk: checked
- EFI Storage: select the data drive for where the EFI storage will reside
- SCSI Controller: VirtIO SCSI Single
- Add TPM: checked
- Select the TPM storage container under TPM Storage To read more about the various settings and reasons above here are some links to documents which will help answers these questions:
- TPM Settings
- Machine type
- Info on BIOS and UEFI
Step 5
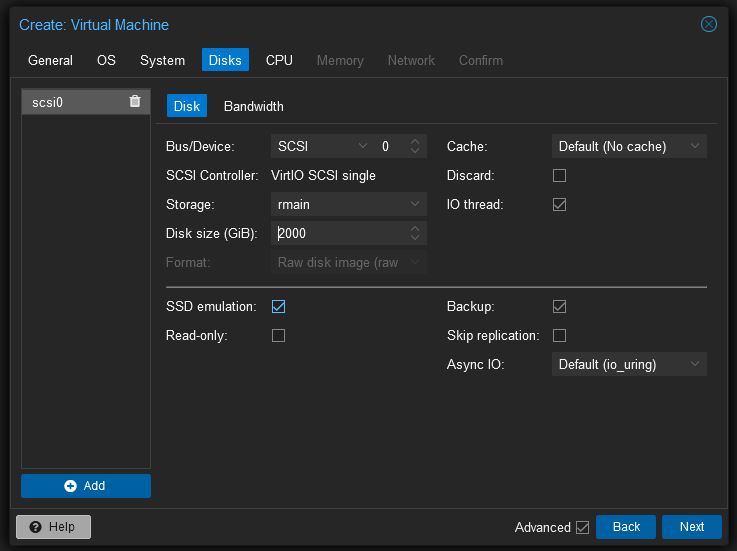
- Select SCSI under BUS/Device
- Select the storage container under the “Storage” option
- Assign how much disk space the VM will have under “Disk Size”
Step 6
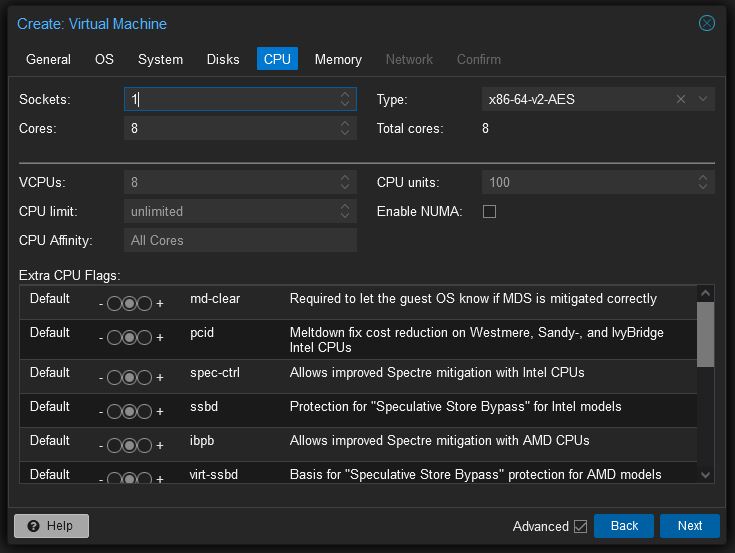
- Configure the number of cores/vcores the VM will have
- For “Type” select x86-64-AES
- The next tab “Memory” (not shown), merely assign how much memory (RAM) the VM will be able to access.
That is about it as far as setting up the VM. If you want to configure additional networking you can in the “Network” tab. Once done click “Finish” once on the “Confirm” tab.
Once the VM is created, select the newly created VM > “Hardware,” and then:
- Add
- CD/DVD Drive
- Select the storage drive which contains your ISOs, and then select the virtio-win.iso file downloaded earlier
- Click Add
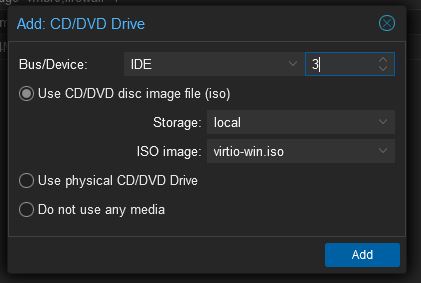
This will virtually add the virtio iso image will we likely need later.
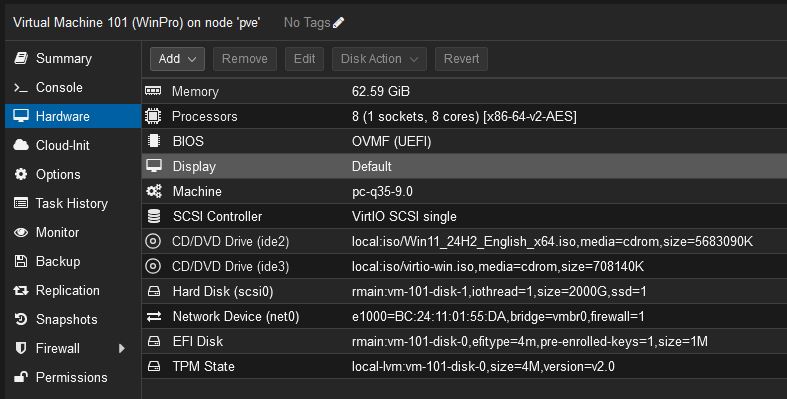
Once done your “Hardware” tab should look something like this:
Installing
- Select the VM, “Console” and click “Start”
- When the Proxmox logo appears press the space bar to boot from CD
- Follow the Windows 11 PRO installer
Adding Drivers
- You will likely get to a point where you need to set up/format drives, however, you may also notice no drive options exist.
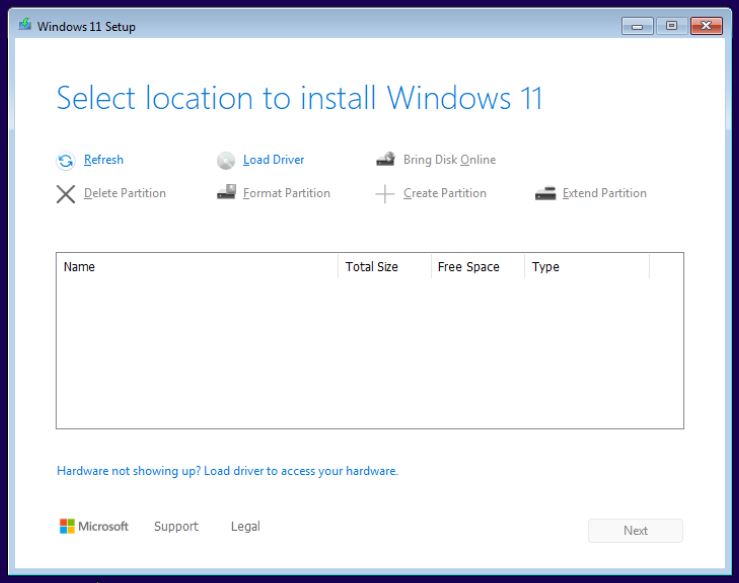
- Click “Load Driver”
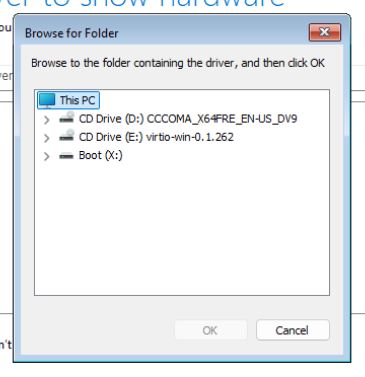
- Select the CD Drive that has the VirtIO driver, in the example below this would be the E: drive.
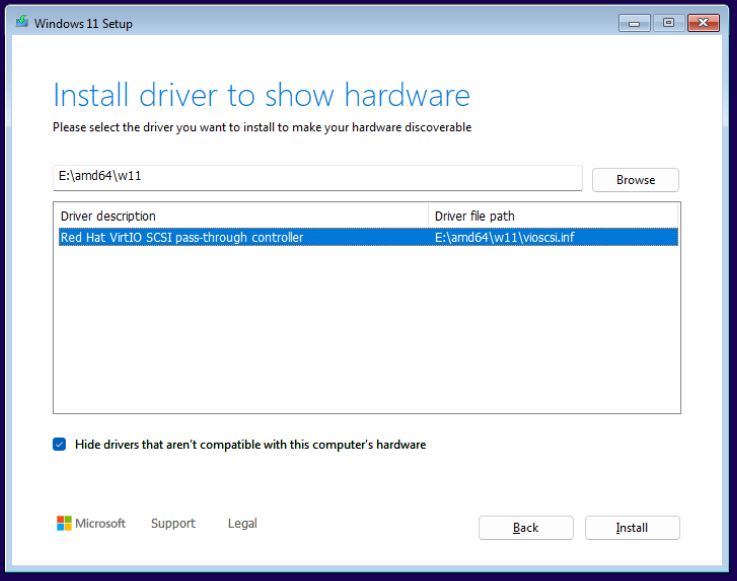
- Navigate to and /amd64/win11, “Click Install”
- Once installed the disk space set up during the provisioning of the VM should appear. You can then continue the install as normal.
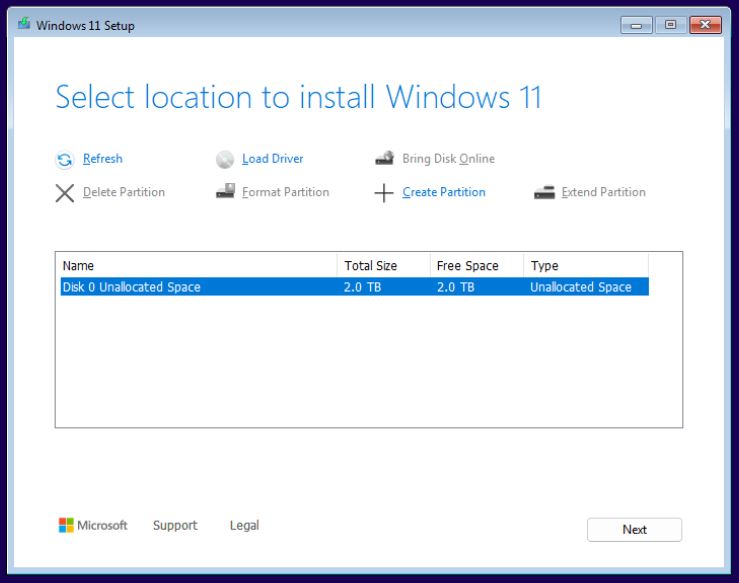
Once installed, you should be able to boot and run Windows 11 PRO as normal. It may be useful to remove the CD Drives from the hardware tab.
